These two tutorials are a repeat from 2005, however they are pretty fun so here we go!
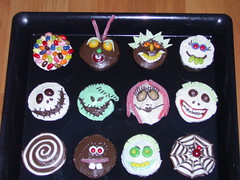
O.k. So this is the first run of cupcakes! I wasn't prepared for the decorations with special candies or frostings, but went ahead and came up with these little beauties with what we had on hand:
Dunked in Jelly Bellies, You're Bugging Me!, Spike, & Don't Forget to Floss.
Jack Skelington, Oogie Boogie, Sally, & Stock
High Anxiety, Buck, I only have eyes for you, & Miss Spider.
All cupcakes were chocolate with vanilla or chocolate frostings. I used Mega M&Ms, tiny M&Ms, Jelly Bellies, Life Savers, Sour Patch Strips, Green Apple Gum, Eclipse Gum, Jolly Rancher Rocks, and black Jimmies.
Frosting was applied via a zip lock bag snipped at one corner or with a butter knife. I also used a bamboo skewer to aid in the placement of many Jimmies! I am sure when I actually get out the cake gear and use the pro stuff they will come out even better. In the mean time, we're eatin' cupcakes for dessert tonight!
To view cupcake details more closely, click on the photo above. This will take you to my photo page at Flicker! Find the photo stream st the top right of the page and click the "next" photo, it should be titled: "I'm ready for my close up!" double click. It will come up full screen and with much better detail.
For an older tutorial on making CHEAP and easy tombstones click: Tombstones. Scroll down to the tombstone photos and follow the instruction beginning with "a" and finishing up with "g".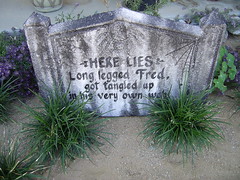
In the "spirit" of Halloween, I spent the afternoon in quiet solitude and carved up some fun! The undertaking? Tombstones!
This is the first of the new tombstones for this year. (2005) This one is 24" wide by 16" high and is made from 1" thick foam board insulation that comes in a variety of sizes. I chose the 4'x8' sheets. About $12.00 out the door and into the minivan.
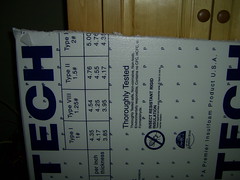
If you are like S'mee, you will need to have the guys on the floor cut it into 2 pieces for you (so it can fit in your vehicle). As you can see in the photo, there are indeed "lines" that one could follow -if they wished to do so- the guys I was working with at the time were less than cooperative and decided to "freehand" it on the totally white side without marks and guidelines. UGH! and GRRR!
Make sure you stress the first cut along the lines, otherwise, like S'mee, you will lose one inch, or more, when they cut it diagonally. again UGH!
O.k. so click on that Flickr! link and get started, seriously, if you work in assembly line fashion, this only takes a few hours and you can whip out an entire graveyard!

2 comments:
I adore the cupcakes-- so very creative with regular stuff! Love it!
Thanks Rynell, you could have so much fun making these for the kids.
Post a Comment